Pinstripe Pillar Candle
- Crafty Kits

- May 26, 2022
- 4 min read
Updated: May 31, 2022
Instructions to create your candle using our "Pinstripe Pillar Candle" Kit found here.

Preparation
Give your mould and melting jug a good clean. Rinse them with hot water and allow them to fully air dry before use (or use a lint-free cloth).
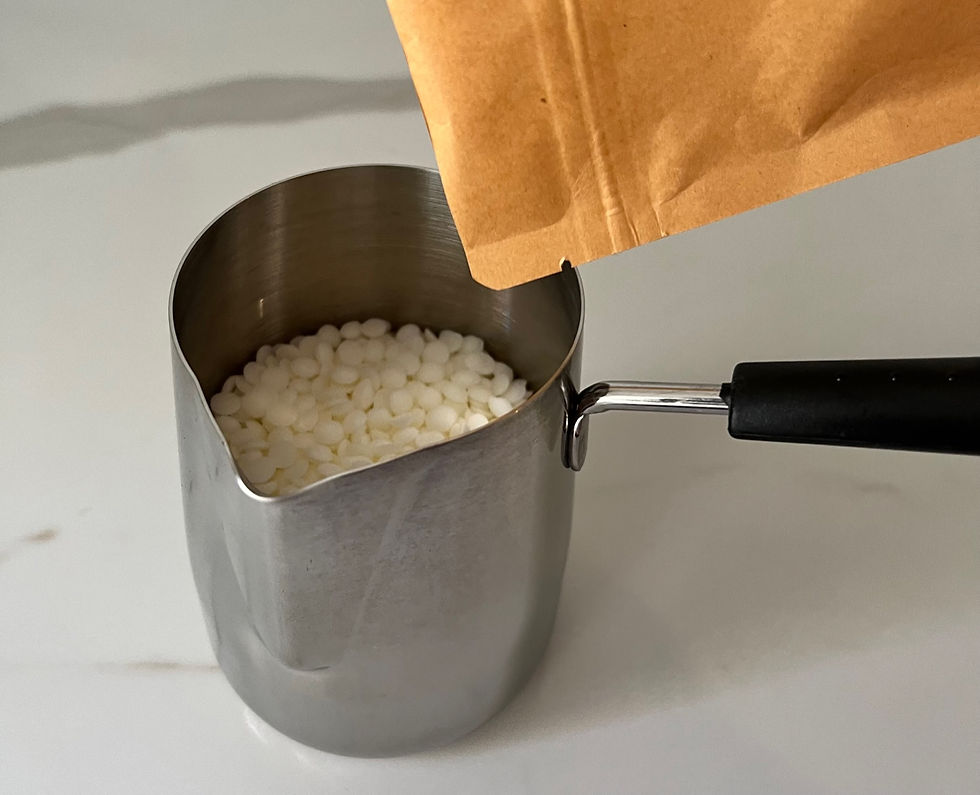
Step #1
Put on your pair of supplied gloves.
Empty one of your pouches of soy wax pellets into your stainless steel jug.
Step #2
Take your colour chip and cut off a very small amount. I recommend starting with only 1/4 or less of the chip. It is easy to add more but you cannot take it away. Start with much less again if you want a really subtle shade.

Step #3
Place the colour chip section into the jug with your wax pellets.

Step #4
Place your jug into a saucepan containing water and place this on the stove. Keeping your stove on low - medium heat, gently stir your wax often while it melts.

Step #5
When your wax is close to melted, place your thermometer into the jug. Continue to gently stir and monitor.

Step #6
Once your wax is fully melted you can test the colour by placing a drip of your wax onto a white heatproof surface. Add more colour if you desire and ensure it fully melts.

Step #7
Please ensure you are measuring the wax temperature with the thermometer end in the centre of the melted wax. The metal will be hot so the temperature will be inaccurate against this. Once your wax reaches 75 degrees celsius turn off the stove and remove your jug from the saucepan to begin the cooling process.

Step #8
While the wax begins to cool we will prepare our candle mould. Take your mould, your long needle, one length of wick, and your white putty. Thread the wick through the eye of the needle.
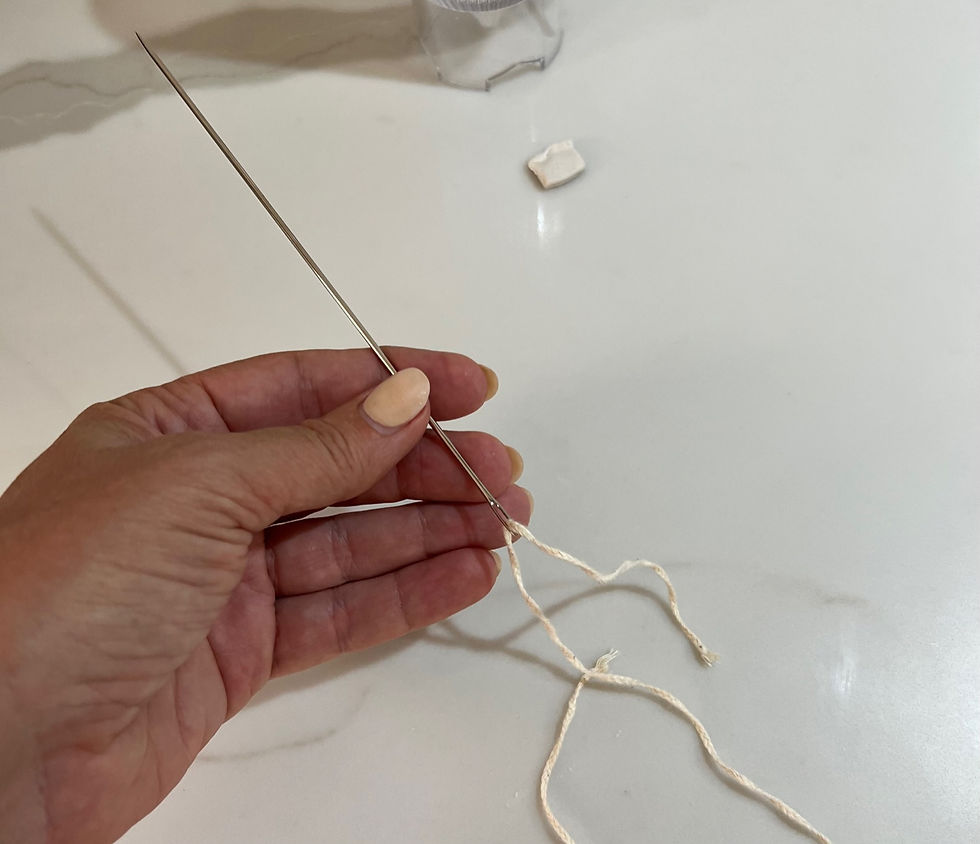
Step #9
Use the needle to thread the wick through the wick hole in the bottom of your mould. Be careful as the hole section of plastic may be a little sharp.

Step #10
Surround your wick with the white putty and press this firmly into place on the base of your mould. This will prevent your wick from slipping as well as leaking wax. Once this is securely affixed, turn your mould right side up on your work surface. Please ensure that the wick is placed through one of the gaps so that your mould is standing flat.

Step #11
Monitor your wax until the temperature reaches 65 degrees celsius.

Step #12
At 65 degrees pour one of your fragrance oil bottles into the wax.
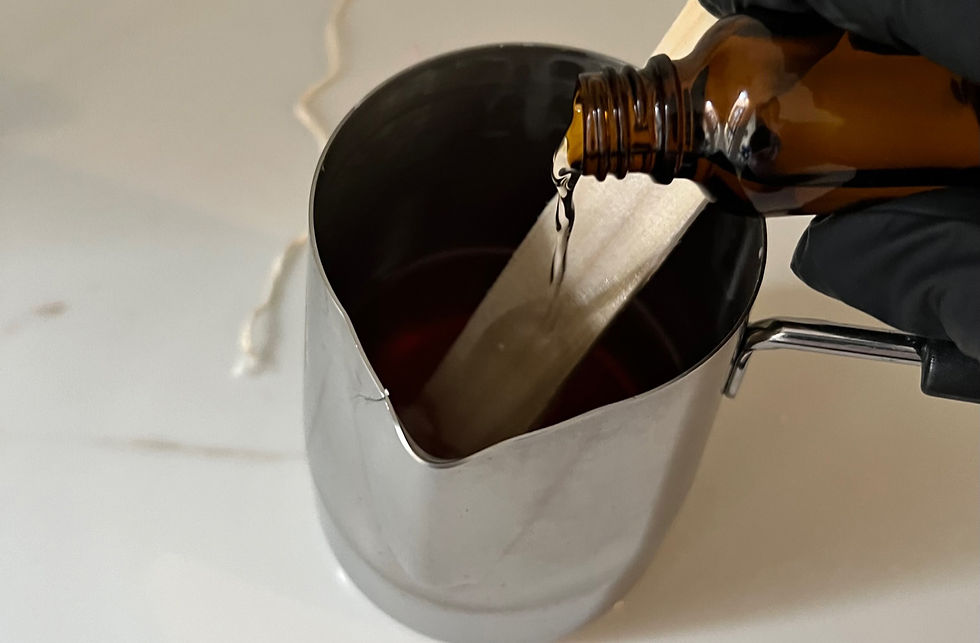
Step #13
Immediately begin to gently stir your wax for 2 minutes. Be gentle and try not to introduce too many air bubbles, but stir for the full two minutes to ensure the oil is fully incorporated.

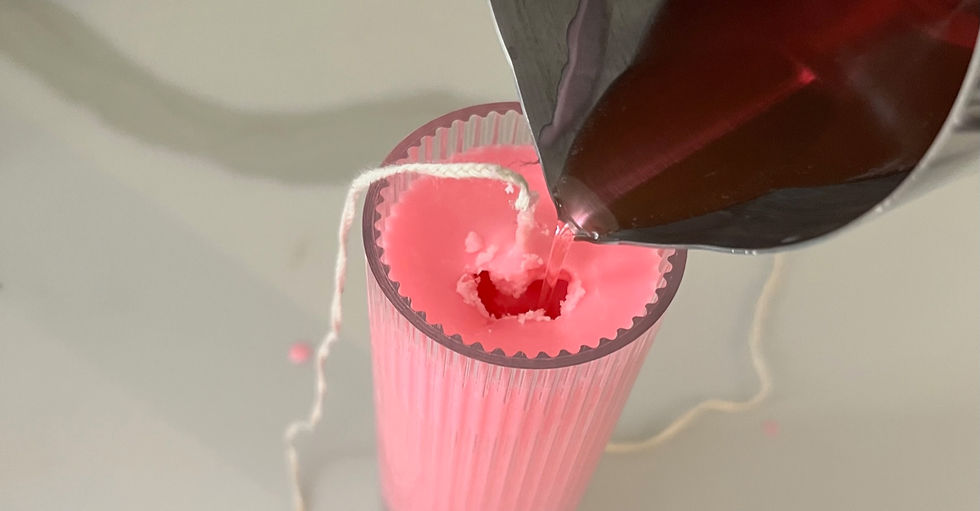
Step #14
Pour the fragranced wax into your mould slowly and stop when you reach at least a half centimetre from the top rim.

Step #15
You will notice that you have a small amount of wax remaining. This is intentional. Please leave the remaining wax in the jug and place it back into your (turned off) saucepan until later.

Step #16
Gently pull the wick taught and then hold it in place with the supplied clip. Position the clip so that the wick is as central as possible. Now allow your candle to completely cool and set for a couple of hours.

Step #17
Once your candle is fully set, you will find a crater/craters on the top surface. This is normal as the wax contracts while it melts creating air pockets at the top. Make sure these craters are open and accessible. If you need to you can poke it open a little more with the tip of your thermometer.

Step #18
Re-melt your remaining wax and then pour a small amount to fill and tidy the cratered surface. Allow this to set again. You may need to repeat this step depending on a number of factors such as climate, humidity, and temperature of the wax. Now leave your candle to fully set overnight.
Step #19
Once your candle is ready for de-moulding the next day, it will look something like this. You may still have tiny dimples or irregularities, but these can still be fixed in a later step.

Step #20
Remove the white putty from the bottom of the mould and then turn the mould right side up again.

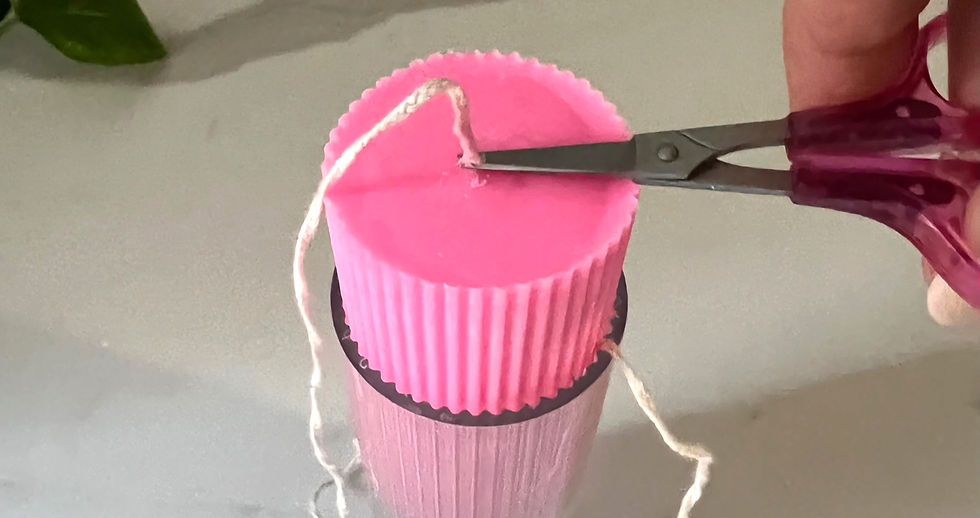
Step #21
The candle should now be able to be easily removed. Once you can access it, trim the wick at the base of the candle. If your candle base is nice and flat and stands steady, I recommend you trim it right at the base so it's flush. If your base needs some flattening (as shown in step 23) then trim the candle wick with a1cm length remaining in place.

Step #22
Fully remove your candle from the mould and place it right side up. Trim the excess wick or double it over and tie it in a loose knot to be trimmed later. If your candle does not stand stable, refer to the next video step. Allow your candle to cure for a minimum of 7 days before use. Then light and enjoy!!

Step #23
Here is a tutorial to fix the base of your candle if it is not flat and does not stand steady (which is quite normal and highly likely!).


Comments