Life Cycle Plant Bags
- Crafty Kits

- Sep 20, 2022
- 3 min read
Instructions to create your own outdoor plant bags using our "Life Cycle Plant Bags" Kit found here.

Preparation.
Please read through all steps before starting so that there can be no surprises.
Decide which size of plant bag you wish to create and then use the instructions on your template sheet to cut both of your fabrics. Please note that this kit will make 1 bag only, in either size. You can purchase an additional consumable-only kit if you wish to make more.
Please install the supplied sewing machine needle (size required for the fabric thicknesses) and thread your machine with the supplied polyester thread before beginning.
Step #1
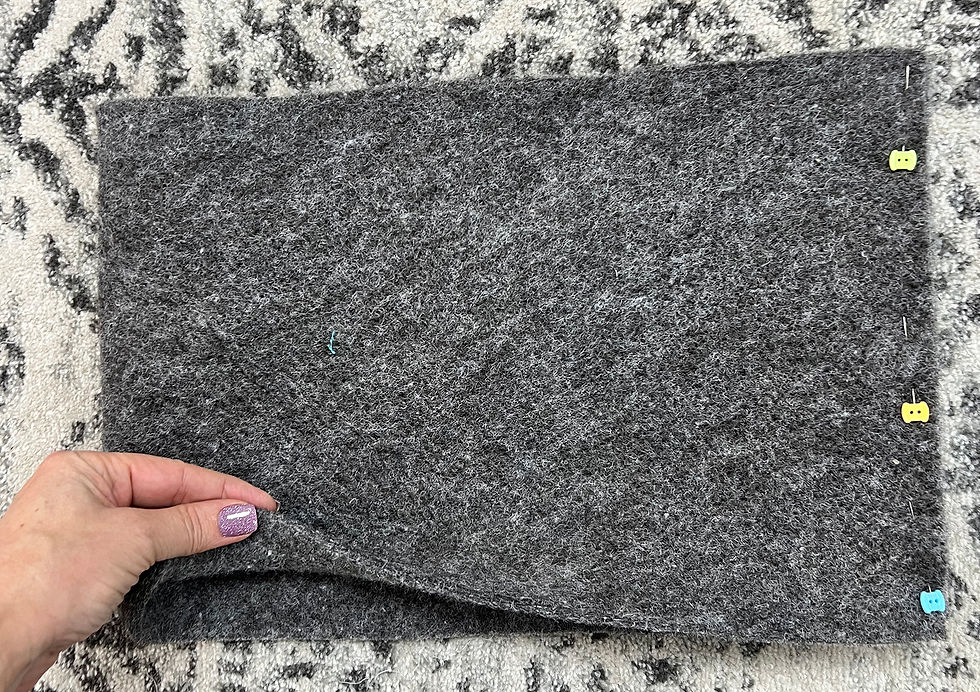
Take your previously cut main piece of Eco felt. Fold this in half, right sides facing, and pin the two short ends together. There is no official "right side" for the felt. You can choose whichever side you prefer as your right side.
Step #2
NB: Unless instructed otherwise, please always use a 1/4" seam allowance.
Sew the pinned edges together securing your stitching at the beginning and end.

Step #3
Take your previously cut top strip of Sunbrella fabric. Fold this in half, right sides facing, and pin the two short ends together. Sew together along the pinned edge to create a ring.


Step #4
Keeping your top band ring inside out, fold one long edge over by ¼" and then fold it over again to ensure a neat edge. Pin together in close increments as you go.

Step #5
Sew the folded hem edge in place all the way around the ring with a ¼" seam allowance.

Step #6
Keeping both your main bag and your top band inside out, fit the band over the top edge of your bag as per the following photo. I chose to match the seam allowances and open them. If your machine struggles with this thickness, just butt them up next to each other. Pin the band in place all the way around the edge.

Step #7
Sew the top band in place. I chose to go around twice for extra strength.

Step #8
If you want to see how it looks you can turn the bag right side out and fold the top band over. After this please put the bag inside out again.

Step #9
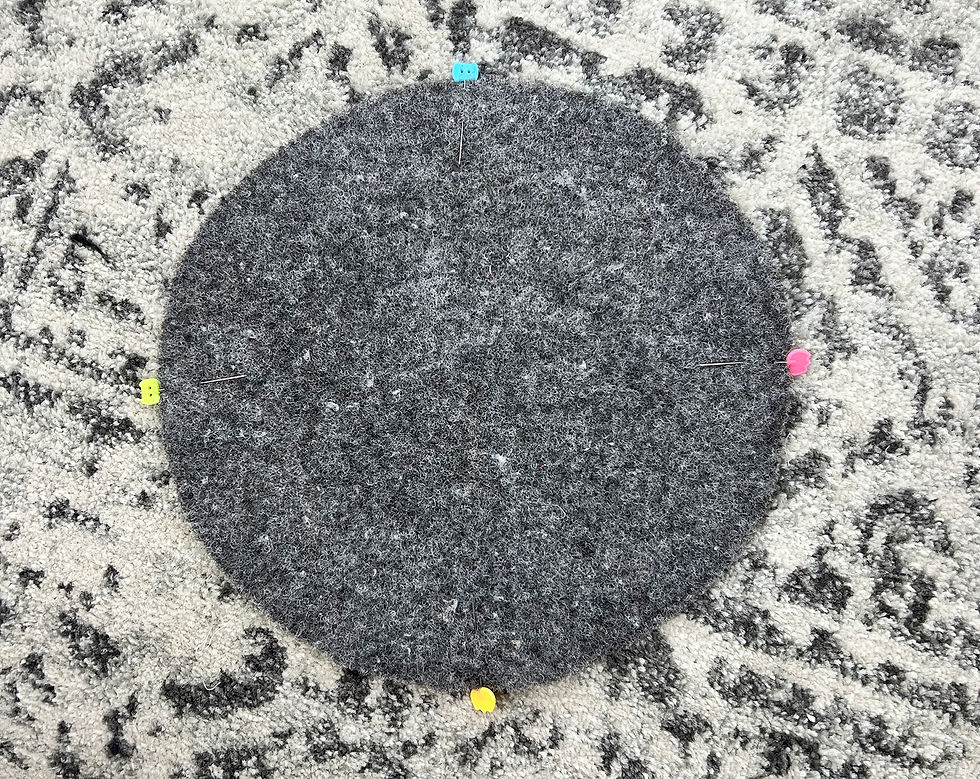
Take your bag base circle and mark the quarter points. The easiest way to do this accurately is to fold the circle in half and then mark the side points. Now fold it in the other direction so that the two marked points meet. Mark the new side points.
Now do the same with the bottom raw edge of your main bag.

Step #10
Match the marked corner points of your bag and base. Pin these together. I find that it is easiest to sew in the base with the base side up, so I recommend you pin through both layers from the base side.

Step #11
Once your corner points are pinned together, you can go around and pin all of the remaining edges.

Step #12
Sew the base into place, easing the curves together.

Step #13
Turn your bag right side out and pop this aside for now.

Step #14
Take one of your handle pieces and fold this in half, right sides together. Pin the long edges together.

Step #15
Sew this edge together, leaving a 1½" gap approx 1" in from one end. Make sure you secure your stitches at the beginning and end of this gap. Repeat with your second handle strip.

Step #16
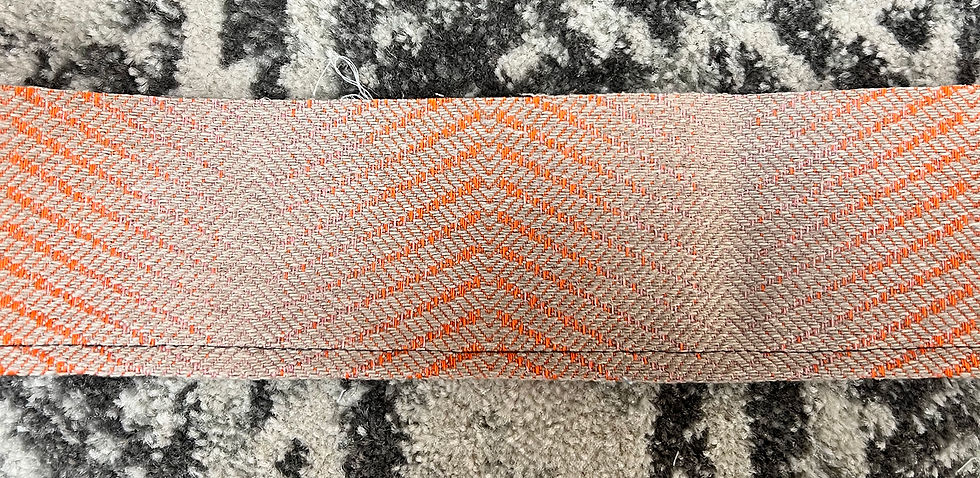
Rearrange your strips so that the seam allowance is on the top and press the seam open.

Step #17
Sew across all the short ends ad trim away the corners.

Step #18
Turn the handle right side out through the gap in the seam. This is fiddly due to the thicknesses of the fabric, but is completely doable! As you can see below, I open up one end, and then press a long object (like a chopstick or paintbrush) against this end. Maneuver and push this into the tube and then through the turning gap.


Step #19
Give your handles a good press. And then top stitch with a number of lines.


Step #20
Take your main bag and mark the middle side points.

Step #21
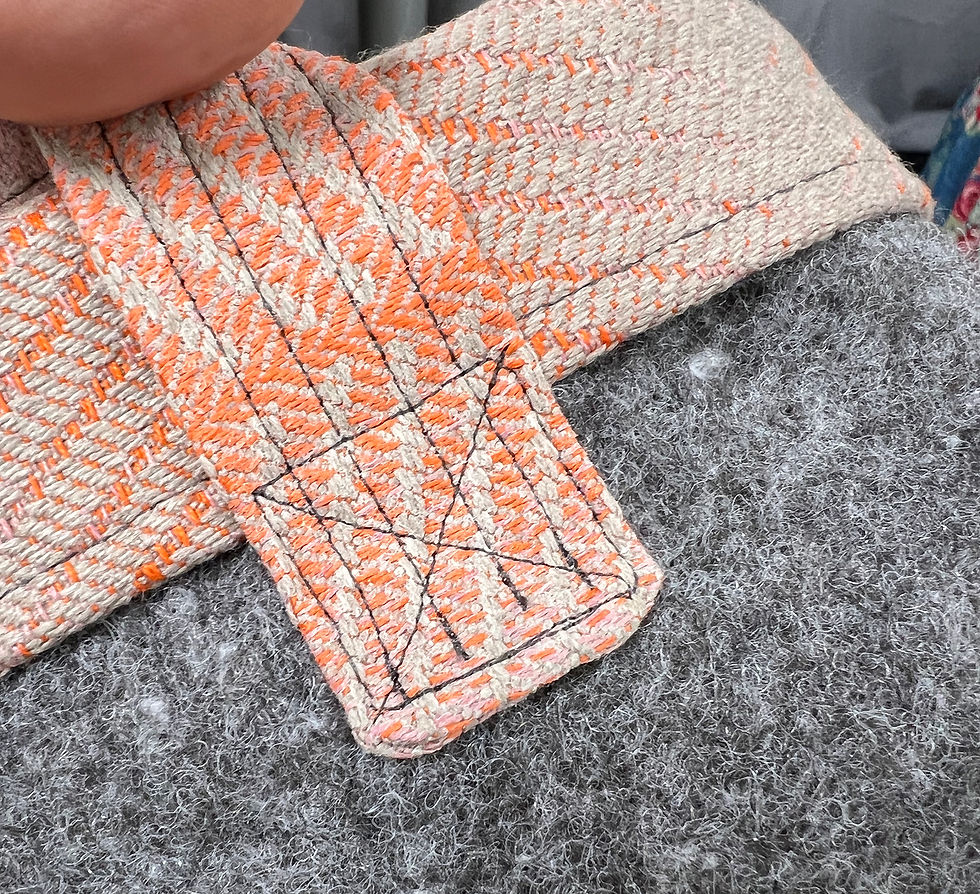
Take one of your handles and position it around one of your side markings. I positioned mine approx 1" to each side of the centre markings. The bottom short ends of my handles are approximately 1¼" from the Sunbrella fabric hem edge. Pin or tack these in place.

Step #22
Topstitch the ends of the handles into position. I chose to sew a square and then an X in the middle. My top row of stitching also goes through the very bottom of the Sundrella fabric hem to secure this in folded in place at the same time.
Step #23
Go shopping and find a new plant baby for your bag! Pop it outside and admire your creation!!


Comments