Mini Velvet Darla
- Crafty Kits

- May 26, 2022
- 4 min read
Updated: May 31, 2022
Instructions to create your plush deer using our "Mini Velvet Darla" Kit found here.

Preparation.
Please read through all steps before starting so that there can be no surprises.
If you wish to create a clever stuffing tool with the included paintbrush (this is what I only use for my stuffing!) then please watch this video.
Step #1
NB: Please use the provided polyester thread for all sewing (machine and hand).
You have an enclosed copy of the Melly & me sewing pattern for the original large 'Darla', however, please follow these modified instructions for the kit.
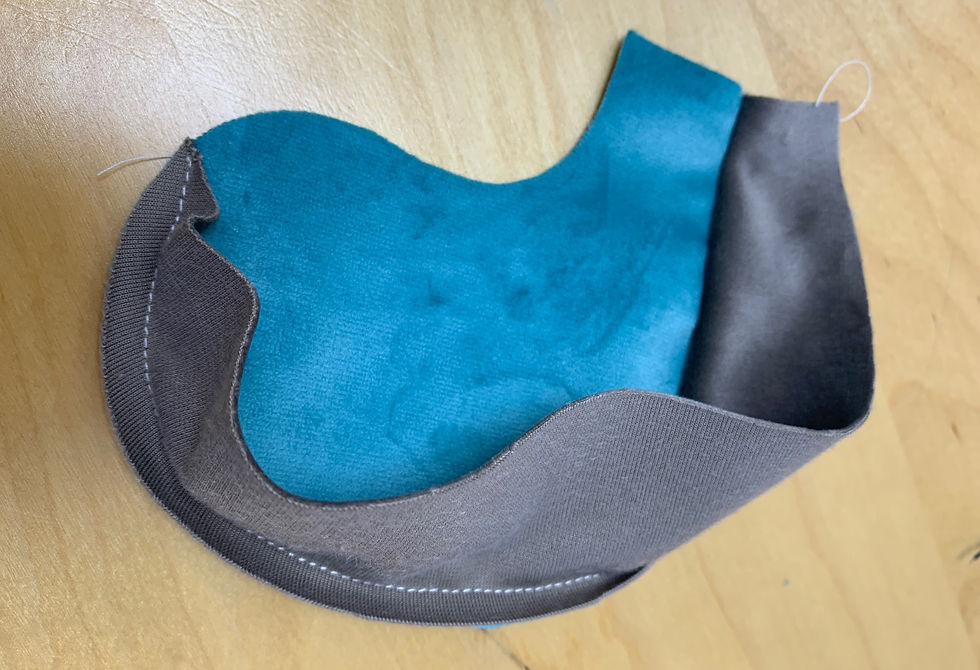
Take your head gusset piece (shown below) and sew the marked darts into place, with the right sides together.

Step #2
NB: Unless instructed otherwise, please always use a 1/4" seam allowance.
Take one of your main head pieces and the head gusset. Ease and pin the head gusset into place as per the following diagram. Make sure you note where the ear gaps are (Pre-marked) so that you do not sew this section. You will see I have pinned the start and end of the gap with 2 vertically placed pins. Sew the gusset into place from the nose to the neckline, leaving the marked ear gap unsewn.

Step #3
Pin and then sew the other main head piece to the other side of the head gusset in the same manner. Again you need to mark and leave the ear gap unsewn.

Step #4
Pin and then sew together the front edges of the two headpieces from nose to neck.


Step #5
Take your four ear pieces. Place one of each colour on top of each other, right sides together. Pin and then sew together, leaving the straight edge open for turning. Repeat with your remaining 2 ear pieces to create 2 ears.


Step #6
Trim your seam allowance by about half and then turn your ears right side out with the non-bristle end of your paintbrush.


Step #7
Using the provided hand sewing needle and some of your polyester thread, take small running stitches along the open edge of your ears and pull the thread to gather the edge. Tie a knot to secure the gathers.

Step #8
Insert your ears into the ear gaps on the head. Make sure the raw ear ends poke through by approx 1/4" and that the brown/cream side of the ear is facing the brown/cream head fabric. Sew the ear in place by sewing along the ear gaps, meeting your previous stitches.


Step #9
Turn your head right side out and create a tiny hole where the eye marking is.

Step #10
Insert the safety eyes through the hole. Then attach and press to tighten the backings from inside the head. Your head is now complete and you can put this aside for now.


Step #11
Take your body gusset and one of your main body pieces. Ease and pin the gusset into place, starting at the top neckline and continuing around the tummy until the gusset ends.

Step #12
Sew the gusset into place, starting at the neck and tapering your stitches to the point on the tail end (as shown below). Now pin the following main body piece to the other side of the gusset, starting at the neck and continuing past the gusset along the back and to the other side of the neck. Sew together.
Step #13
Take your eight leg pieces. Place one of each colour on top of each other, right sides together. Pin and then sew together around the entire edge. Repeat with your remaining 6 leg pieces to create 4 legs.


Step #14
Trim your seam allowances by approximately half.

Step #15
Take each leg and using a seam ripper or scissors, cut a small 1/2" vertical slit into one layer of fabric only. This should end approximately 3/4" from the top seam. You want to do this into the fabric that will be the inner leg (so that this slit will be hidden against the body).


Step #16
Turn all of your legs right side out through the slit you have just made.

Step #17
Stuff the legs very firmly with your toy fill using your stuffing tool.

Step #18
Once the legs are firmly stuffed (it is essential they are firmly stuffed to hold your toy upright), you can slip stitch the openings closed.

Step #19
Stuff your head firmly. Once fully and firmly stuffed, fold the raw neck edges in.


Step #20
Stuff your body firmly

Step #21
You should now have the following collection of firmly stuffed body parts.

Step #22
Attach the head to the body using ladder stitch. The following video tutorial will help you.
Step #23
Take your two remaining tail pieces and place these right sides together. Pin, and then sew together, leaving the straight end open for turning. Turn right side out, stuff firmly, and fold in the raw edges.


Step #24
Position the tail in the desired location. You can hold this in place with a pin or two and then ladder stitch the tail in place using the same method as attaching the head.

Step #25
The following tutorial will walk you through the technique for attaching your legs with button jointing.
Step #26
Tie a bow around your Darla's neck if desired, using the supplies length of ribbon. Now enjoy your creation!!


Comments